Are you a small business owner? Do you want to improve your brand image and make customised social media posts, but you don’t have a dedicated design team? Then this blog is for you.
What is Canva?
Canva is a free graphic design software that provides templates, fonts, design elements and photos to help you with your designs. It is a great tool to create custom designs without having to pay huge fees. That being said, for large scale or permanent designs, we would still recommend hiring an expert. Canva is best for creating quick social media posts, flyers or posters for events and simple graphics.
In this blog we’ll take you through how to create your first design, the top features Canva offers and some examples of what you can use it for.
Pricing
Before we start, while Canva’s free plan is fantastic for those starting out, be aware that they do have paid options and some elements may not be available to you in the free version. However, it is definitely worth creating yourself an account. You can always consider the ‘Pro’ plan (£10.99 per month) if you find yourself using the software often and it adds significant value to your business. Any element that requires the Pro plan will have this symbol next to it![]() . If you add one of these elements to your design, it will feature a watermark and offer you the opportunity to either upgrade or pay a one-off fee to use that specific item.
. If you add one of these elements to your design, it will feature a watermark and offer you the opportunity to either upgrade or pay a one-off fee to use that specific item.
Understanding the layout
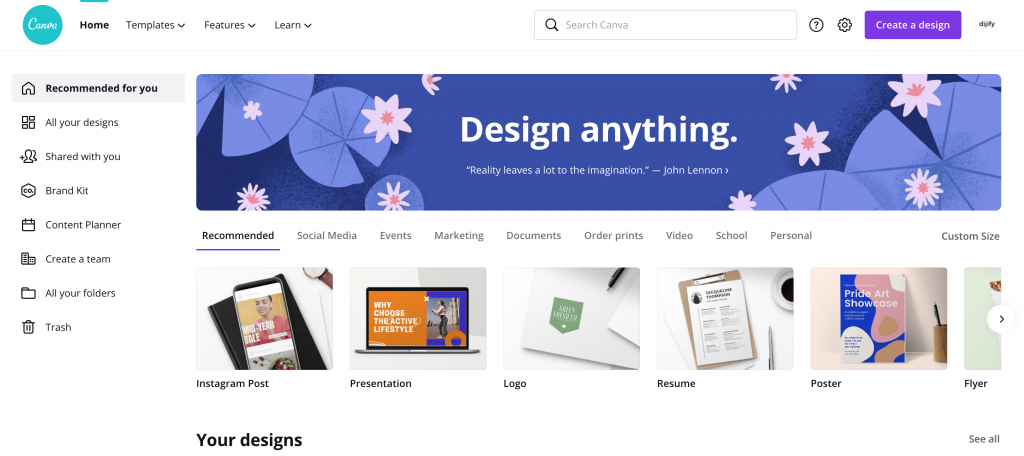
Canva’s user interface is pretty easy to navigate. However, like any new software, it can take a little while to get used to. When you first log in you will be shown your ‘Homepage’. The majority of this space is taken up by templates and recommended designs that Canva thinks you may be interested in. The left-hand column is where you will find your existing designs (once you’ve created them) alongside designs others may share with you, and the trash folder.
On the top left you will find options to browse different templates, features and explore Canva’s own blog. On the right is the search bar, where you can search for a specific template or design size (for example Instagram Post or Flyer). Here you will also find the ‘Create a Design’ button. Surprisingly, you won’t use this button often as every template, suggestion and search will also give you the option to start creating.
Creating your first design
As mentioned above, there are many ways to start the design process. We recommend that you start by choosing the type of design first. Say you are wanting to make a new blog announcement for your socials, pick the social platform you use most often and search for that. In this example, we searched for Facebook and chose the ‘Facebook Post’ option.
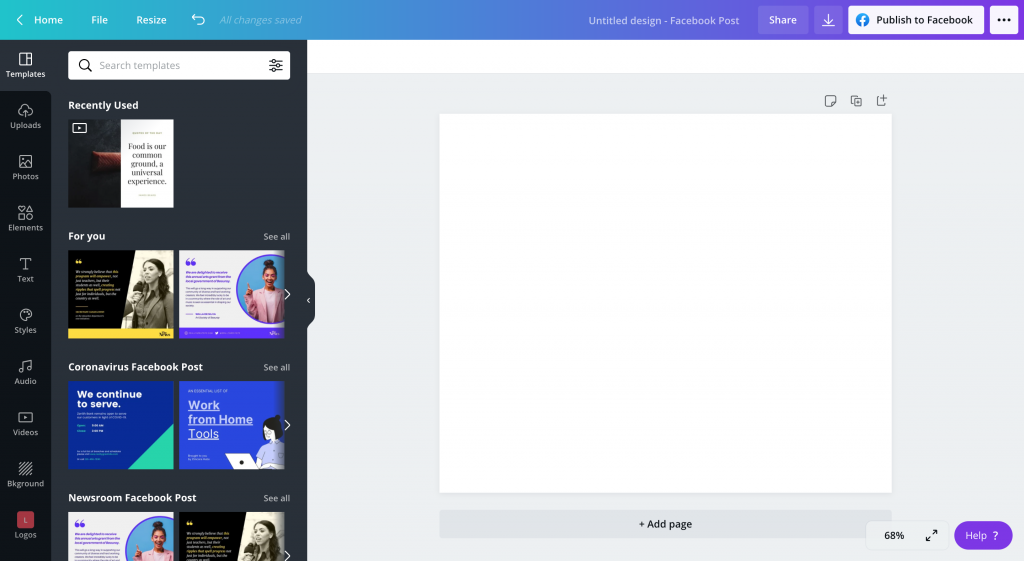
You will then be presented with a selection of templates, but we would advise that you select the option to create a blank design. This is due to the fact that you can access even more templates and ideas once you start designing, so you are not missing out on anything here. Once you select this option your screen will look something like the example below. This is where the true fun begins.
Templates
We told you not to worry about templates and here’s why; within the design page you can search for specific templates, ideas and inspiration. They will all be tailored for the specific design and size you want. Continuing our example, you could simply enter ‘blog’ in the search bar on the left and be presented with a huge number of ideas to choose from. Simply click any template you like, and it will appear on your blank design. From here you can select each individual component of the design and customise it to your branding. You can change the colours, text, fonts, photos, and elements to make it unique. We would definitely suggest doing so, as you do not want to use the exact same unchanged template as others. If you need help choosing a colour palette for your design, check out our blog on colour psychology in branding.
Uploads
This section allows you to upload your own photos, logos and elements. This will level up your customisation. If you wish to feature a photo encouraging potential customers to buy a specific product from you it’s best to have your own images. Using a stock image in this scenario can confuse potential customers about what to expect. An example of this you may have come across is several take out companies using the same promotional photos on JustEat.
Photos
However, if you don’t have a specific photo in mind, Canva has you covered. They have a huge selection of fantastic stock photos. Even the most random of search terms will likely produce several useable results. Some of the more abstract photos can be great to use as the background for a text-based post.
Elements
The free elements that Canva provide are invaluable for adding that little something extra to your design. They have icons of everything from microphones to flowers or pizza. In this section you will also find basic shapes that can be made any colour you wish, and photo frames. There are so many unique & creative ways to use elements in your design. Try searching and experimenting!
Text
Is it just us, or is choosing a font always the most difficult part of a design? Luckily, Canva has a fantastic selection and it’s easy to try out as many as you like. The text section shows you some pre-selected font combinations that work well together. You can either chose one of these and edit what it says or instead select to add a heading, subheading or body of text. If you do so, you can then browse their full font library from A-Z. If you need help deciding which font matches the tone you wish display, check out our previous blog on font choice.
Downloading
When you are happy with your design, you simply click the download button in the top right corner. It’s the symbol that looks like a down arrow on top of a horizontal line. Here you will be presented with a multitude of options. You can choose which file type, size, quality and how many pages of your design you wish to download. Canva will automatically suggest the best options for the specific design you are working on, and they are usually right! Once you select your preferred options and hit the download button, you’re all done! You will find your designs in your download folder.
Resizing
Another handy feature is the resize button in the top left corner. This allows you to copy your design in its entirety but change the dimensions. This means that you can take your Facebook Post and use it to create an Instagram or Twitter Post that will only need a couple of tweaks to be ready.
That’s it, now you’re a total Canva pro, we told you it was easy! Hopefully this blog covered everything you need to make some beautiful designs. However, if you have any follow up questions, drop us a message on our socials and we’ll be happy to help.